Showing posts with label cast paper. Show all posts

Thursday, January 2, 2014

Exploring the 3rd Dimension!: Experimentation!


Well, my initial paper casting tests have already taught me a few things.

  1. Soaking and blending the cotton pulp for a longer time is better than a shorter time.
    I followed the instructions on the cotton linters package, but the pulp turned out rather lumpy and completely fell apart when I went to remove it from the mold.  The next time, I soaked it longer and blended it longer, and put in a teaspoonful of an additive that is supposed to neutralize any acidity in the pulp (which is irrelevant, since the cotton is not acidic), and make for a smoother surface.  This mixture worked much better, the texture was finer, it did indeed have a smoother surface, and it held together when removed from the mold.  It also seemed to dry a bit quicker.

Some rough cotton pulp castings
    2.   Don’t use an unsealed plaster mold.

    Since I don’t yet have everything I need to make my first custom mold, I just used some things I had on hand to do some tests.  One was a cast resin Celtic cross wall hanging.  Another was a plaster plaque I’d made and used to try out some carving techniques.   I sprayed both with a bit of cooking spray as a mold release. The resin piece was roughly sculpted, but worked pretty well.  
    But the plaster piece, after the watery pulp juice soaked into it, and I pressed down firmly with my sponge to remove as much water as possible and get the pulp down into the nooks and crannies, ended up falling apart as I removed the finished cast. 
Many of the tutorials I’ve seen on paper casting use terra cotta molds, which are fired.  I imagine that makes the difference.  

Oops!
    3.  WAIT until it’s dry to try to remove the paper from the mold.

    This is challenging! A lesson in tempering my enthusiasm with patience.

4.      Sizing matters.

    I don’t know why this didn’t occur to me before, since I am well aware of the necessity of sizing substrates that are going to be painted.  Sizing is a substance that reduces absorbency, so ink or paint doesn’t bleed or feather into the surface.   
   Turns out those pure cotton linters fibers are pretty damn absorbent!   Considering cotton is used for wound dressing and maxi pads, this should have been an obvious consideration.  Perhaps it was because most of the paper casting tutorials I’ve seen were not intended to be painted.  Fine art applications of cast paper are often left in their pure white state, so sizing wasn’t mentioned. 
     In any case, my attempt to apply a base coat of acrylic paint to my unsized test castings resulted in the fibers soaking up the moisture and swelling and basically ruining the integrity of the cast form. 
    My initial research into possible sizing options have revealed that there are two basic types: internal, which is dissolved into the wet pulp, and external, which is applied to the surface after the paper has dried.  I think internal would be easier and more appropriate for what I’m doing.  Possible additives include white glue, gelatin and various starches.  I’d rather not deal with food-based stuff, since various critters consider them tasty and I’d like to avoid having my work nibbled by moths or mice.  And I already have a ginormous gallon bottle of Elmer’s Glue sitting in the corner.  Hopefully it hasn’t dried out into a solid brick.  I’ll start with that and see how it goes.

UPDATE!

   Since I started this post a few days ago, I’ve been playing around with various mixtures of pulp, glue and plaster.  The mixtures with the glue have not set up correctly.  But I don’t think I’ll need the glue.  Just Plaster of Paris and pulp seem to be giving me the lightness, durability and harder, less absorbent surface that I need.   
   I realized that the pure pulp surface was too soft to hold up to the multiple layers of finishing I want to do.  But with the addition of plaster, the surface takes detail well and can take paint and other finishes perfectly.

Plastic lid + broken earring + cotton pulp & plaster = ART SCIENCE!!!
   To test my various mixtures, I made some simple disc-shaped castings, using the plastic lid of a catnip container as a mold.  Cat didn't mind.  Unlike any time I pull out the sewing machine, Cat doesn't seem all that interested in this process.

  The plaster/pulp mixtures set to the point of de-molding quite quickly (within a half our to an hour for these little discs).  This is much shorter than for the pure pulp, which took several hours to a few days to dry to the point where it could be removed from the mold without risk of damage.
   However, there is a fairly long curing time for the pulp/plaster mixture. By curing I mean the piece is fully dried and hardened.   Plaster is interesting because it hardens via a chemical reaction, not through evaporation – and that chemical change creates heat. So it gets warm as the chemical reaction takes place. But once the plaster has chemically set, the water still needs to gas off, and the evaporation makes it cold to the touch. This is true of plaster in general, but I think the large amount of water in the pulp increases this curing time.  While it's still cold, the plaster is still somewhat damp and delicate.
It's  also somewhat malleable.  During this time, I can add subtle surface texture by scratching and pressing with various tools, smooth and shape stuff and generally customize each casting fairly easily, making each one truly unique. 
   Once it returns to room temp, it’s hard and sturdy and lightweight and perfect.  I can literally throw it on the ground and it won’t break. :)

Testing surface finishes
  Another thing I’ve been testing out is Gilder’s Paste – a surface finish consisting of metallic particles in a wax base.  This stuff is similar to the more familiar Rub-n-Buff, which comes in a tube.  Gilder’s Paste comes in a flat tin, which is much easier to work with, and has a much wider selection of colors to choose from.  It can be applied to almost any surface with a fingertip or thinned and applied with a brush or other applicator.  Colors can be mixed and blended, too.  Once the wax has dried, it can be buffed with a soft cloth to a lovely metallic sheen.
   Very shiny!
    I was all set to spend a chunk of Christmas gift cash (thanks, Mom!) on a selection of Gilders Paste colors after the holidays.  But before I could place my order, I came across a box of art supplies I'd inherited from Dore's father, who passed away last year.  
    He was a craft enthusiast, mainly interested in stamping.  He had a wide selection of stamp crafting supplies, many of which he'd gotten for free from the manufacturers because he wrote product reviews for various crafting magazines and websites.  He mostly made cards, which he created by combining various stamps into a composition and then coloring the image with various paints and craft finishes.  He loved lighthouses, and most of his pieces featured a lighthouse somewhere, even if it was peeking out behind a tree in the distance. 
   Lo and behold, as I excavated this box of treasures, what did I find but 20 tins of Gilders Paste!  Pretty much every color I was planning on buying and more, each worth about $10.  I feel like I got a special Christmas gift from beyond the Great Mystery.  Thanks, Joe! :)
A Gift of Gilders Paste!

   So my plan is to base coat each piece with acrylic paints, then highlight the raised areas with Gilders Paste metallic colors, and then add whatever additional color embellishments seem appropriate. Then I'll seal the whole thing with a gloss varnish, which should make the finished pieces damn near bulletproof!

Next step is making my mold!

Monday, December 23, 2013

Exploring the 3rd Dimension!: Research and Theory


I’ve decided to take my work to the 3rd Dimension – adding literal depth and texture to my artwork.
There are many ways of doing this, and I’ve been pondering the possibilities.

There are a couple of considerations I have from the get-go that will determine which materials and methods to use.
  1. Most of my work is sold online and shipped to buyers, so I don’t want my pieces to be too heavy or too fragile, both of which make packing and shipping more expensive and risky as far as damaging unique and irreplaceable items.
  2. I prefer to create ready-to-display pieces that don’t require framing.  I’ve heard numerous tales of people buying prints or original art, excited to put it up in their homes, only to realize that matting and framing the piece would cost another $100+, often resulting in the artwork languishing as other priorities are attended to.
So…I need something lightweight and sturdy, that’s ready to hang or display as-is.
These requirements eliminate a lot of materials, including earth-based clays and ceramics, plaster and cultured stone.
Possibilities that meet these requirements include some resins and various plastic formulations, especially foam-based ones, which reduce weight by replacing much of the bulk with air bubbles.
However, working with these chemicals often requires ventilation, special equipment, etc.  Waste material cannot be recycled.  It can also be expensive.

Another option that I find particularly intriguing is cast paper.
Basically, this is paper pulp that is pressed into a mold to shape it.  There are numerous artists working in this medium, using a number of different formulations and techniques.   
The basic recipe is just any old paper that is torn into small pieces, soaked and blended with water in a blender to break up the fibers.  This watery pulp is then pressed into a mold and the water removed using sponges and evaporation.

There are also numerous additives that folks have experimented with to add different properties to the paper pulp – including glues, starches, wallpaper paste, joint compound, clays and plaster.

This fortified paper pulp (and/or strips) is generally considered paper maché, an ancient sculptural medium that is unfortunately not terribly well-respected these days.  It is most commonly associated with grade school crafts and cheap piñatas. 

But this medium has a long and interesting history.
The ancient Egyptians used it to make coffins and death masks for their mummies.  In Asia and the Middle East, beautiful lacquered jewelry boxes and trays were crafted.  It was also used to add decorative elements to amour and shields of samurai warriors.

http://leeadairlawrence.files.wordpress.com/2011/03/screen-shot-2011-03-25-at-10-56-32-am.png
Eboshi-Shaped Kabuto (Helmet) with Maedate (Crest) in the Form of a Mantis Edo period, 17th century Iron, lacquer, cord, silk, wood, gold, and papier-mâché; H. of bowl: 8 in. (20.3 cm) - Art of the Samurai at the Metropolitan Museum of Art

In 18th century, European architects and designers devised waterproof paper maché formulations to create cheaper and lighter decorative elements for buildings, coaches and furniture.

It was used to skin wood-framed canoes and observatory domes and even to make projectiles fired from guns and artillery cannons.   

File:Schenkl projectile.jpg
The Schenkl projectile, used in the American Civil War, used a papier-mâché sabot


Other wartime uses included military aircraft fuel tanks made from plastic-infused paper, and paper maché combat decoys of tanks and soldiers that were used to draw enemy fire and help locate shooters.

It has a long history of use in the theater – from scenery and props to masks, costume pieces and puppets. Today is it used to build elaborate carnival floats, lampshades, dolls and effigies of saints and gods that are often burned in sacred rituals.

 And it has always been used to make art.  Paper maché lends it self to art with colorful, primitive, folksy qualities that most people usually associate with the medium, but there are amazing things being done in this with it that go far beyond humble figurines and school projects.

https://blogger.googleusercontent.com/img/b/R29vZ2xl/AVvXsEiy50SI9Gj60650FDSLp7_is1GnLaH2R6PsPwz24xlvsoIixp1MIQttDVLZLDm8JsdXgAnuPYgNx2JiBEcJ3v3dP4ZUqA3kqgJt9qdh-X4jQq0WdeKKnNnzjVVv79aODpVW7Zs2_W_qne0/s320/lg_1472a01.jpg
Oaxacan animalito figure (couldn’t find artists credit)

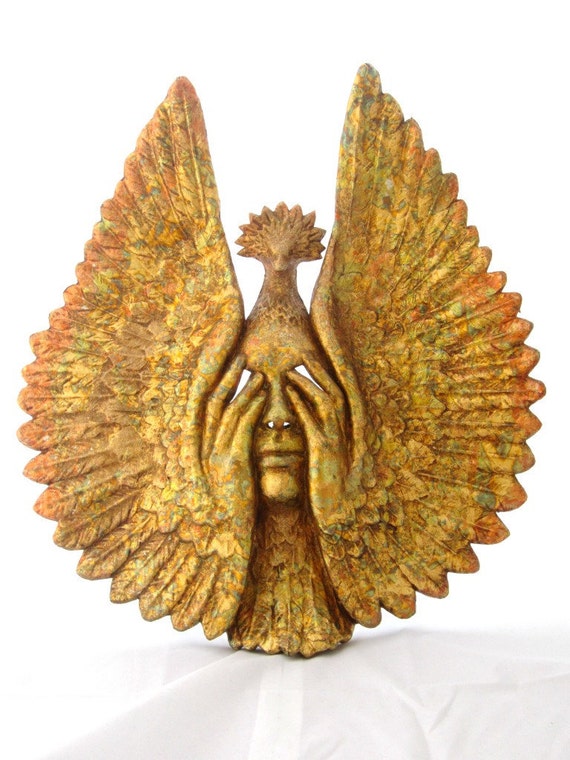
https://img1.etsystatic.com/000/0/6193821/il_570xN.336266829.jpg
https://www.etsy.com/listing/77341374/phoenix-is-rising-venetian-mask?ref=shop_home_active

Troll by Kim Graham  http://kimgrahamstudios.com/index.html


Not to mention the massive, mind-blowing wood and paper maché sculptures built and burned at the Las Fallas Festival in Valencia, Spain every year.  

http://cookinandlookin.files.wordpress.com/2012/03/dsc00703.jpg
Las Fallas festival sculpture


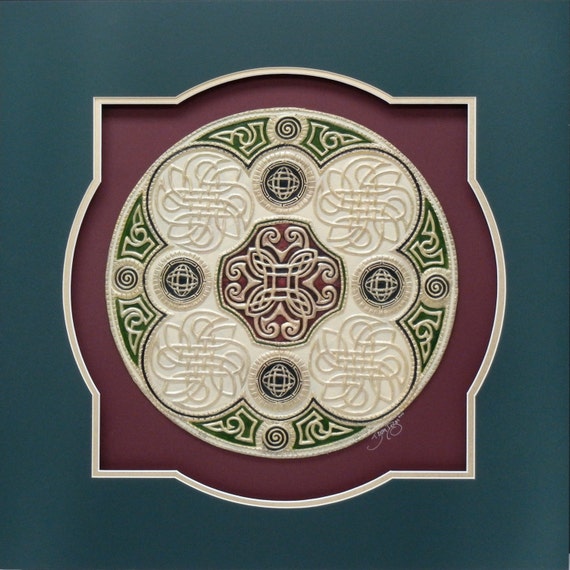
But the artist that is doing stuff closest to what I have in mind is Celtic artist Kevin Dyer. 
He sculpts his original design in wax, makes a mold and uses paper pulp to make a casting from the mold. He then hand-paints each cast.  The results are lovely.  The paper creates a bas relief with an almost porcelain finish, and brings dimension and definition to his complex knotwork compositions.

https://img0.etsystatic.com/017/0/6730141/il_570xN.470589568_ml8u.jpg
Celtic Wheel of Life paper cast by Kevin Dyer

I’d like to do something similar, but less fragile.  I’d like the finished pieces to have the solidity of a plaque or heavy plate that can be hung directly on a wall or set on a display easel.

One material I've been looking into is called Sculptamold. Sculptamold is a blend of paper pulp and plaster, which is non toxic and air-hardens to a very lightweight, strong and durable material. This would seem to be an ideal casting medium, but the texture is rather coarse and lumpy.

I want my surface to be finely textured to grab the fine details of my designs.  The finest paper pulp I've come across is called cotton linters. This is the tiny fibers that are left behind on the cotton seed after ginning removes the longer cotton fibers from the seed. It is naturally acid free, an important consideration for creating long-lasting fine art.  Only paper made from wood pulp has the dangerous acidity that can discolor and degrade paper over time.

So my idea, after much research, is to use fine cotton pulp for the surface layer, and use the Scuptamold to “fill” the cast, adding bulk and sturdiness.  

Theoretically, I think this combination will give me the fine texture and detail I envisions as well as the structure and durability I desire.

Of course, it might not work as I hope.  Air-dry materials tend to shrink and warp, and combining two different materials may well result in unforeseen difficulties.
But that’s what experimentation is for!

I just received my shipment of cotton pulp, Sculptamold and mold-making materials.  I’ll be getting to know these materials and testing my theories (and making a mess, I'm sure).  I’ll let you know what I discover!

After Christmas, I should have some funds to get some exciting new art supplies to finish my casts and make them shine!