Saturday, September 7, 2013

The Adventures of GypsyLocks


Photo by Kaye Porter
So my year-and-a-half-long experiment with yarn dreadlock extensions is over.  I (with Dore's help) devised a method of braiding yarn into the hair and wrapping the braids that created a sort of dreadlock look, and didn't have to be taken out and redone every couple of months like braids do.  You just add more yarn and wrap the roots as they grow out. I call them GypsyLocks.

I really liked how it looked - my hair is normally fine and thin (and worn short for most of my adult life), and I’ve always envied that thick, ropey look of dreads.  After looking into getting actual dreads and exploring other methods of creating the look, I ended up making up my own method.  My hair was about 3 inches long when I started, and I paid a professional braider to do the initial installation, which took about 3 hours.  My method added several inches of length and increased the volume by probably over 1000%!

I dug adding different colors and types of yarn and decorating it with beads and bits of brass tubing, wrapping it with colorful scarves and clipping in feathers and flowers.  It was definitely a distinctive look and a lot of fun to play with.  Styling it was pretty effortless - no styling products necessary, no brushing or blow drying or curling.

However, it did take a bit of effort to maintain, and Dore did a lot of the work, since I couldn’t see or reach a lot of it.  Bless that man!

Photo by Steve Cheski
Overall, it was a fun experience. 
I spent the first 2 weeks feeling incredibly self-conscious...like everyone was staring at me and thinking I was a dirty hippie freak.  But I found that once I adjusted and got comfortable with it - once I owned my weirdness and let my freak flag fly, I got overwhelmingly positive reactions.
 I actually got to know my local shop clerks and neighbors better because I was much more noticeable and recognizable and they felt compelled to comment on my hair, and relationships were struck.  I actually got a lot of compliments on it - from young people (I was a hit at my stepson's graduation!) and old people (the ladies at JoAnne's were especially curious).  I'm sure there were plenty of people who thought I was a freaky weirdo, too, but they didn't mention it to me.  

One downside was that it was hot and heavy, since my head was covered with several skeins of yarn.  When I washed it (about once a week), it would get REALLY heavy, since it was basically a huge sponge, and took a lot of squeezing out and time to dry thoroughly.  If I didn’t let it dry thoroughly, there was the danger of the dreads getting moldy and smelly.  Yuck!

Spontaneous swimming was out. When I did get in a pool, I had to tie my hair up out of the water and limit my activities to avoid submerging.  Hats no longer fit on my head.  I couldn’t wear certain clothing because the collars wouldn’t fit over the volume of hair. I no longer needed to use a pillow (using one gave me a gnarly crick in my neck).  After a while, some of the older braids started looking ratty.  Bits of loose hair began to work their way out and the braids either had to be taken out and re-done, or further wrapped to smooth them out. 

I decided that after Burning Man, I’d pull them all out and start over fresh, with thinner and shorter braids this time to reduce the weight.

Photo by Genevieve

I was correct in suspecting that my braids would be in bad shape after the Burn.  They were full of dust and showering nearly everyday to keep clean and cool ended up resulting in the dreaded (haha!) moldy smell toward the end, even in the dry desert heat.  By the time we left Black Rock City, I was more than ready to get all this yarn off my head.

I started pulling them out on the 12-hour drive home.  This required scissors to snip and nimble fingers to unwind and untangle the strands, some of which had felted and matted together.  Some of the older braids were encased in several layers of yarn.  Underneath the yarn, the hair had formed actual dreadlocks, which then had to be combed out.  It was not a pretty process. 

Two days later, Dore (bless him!) and I were still pulling yarn out of my hair.  I could not believe how much yarn I had in there after a year and a half.  I swear I pulled out at least 5 skeins of yarn and a ton of hair that would have normally fallen out with regular washing and brushing.  By the end, my fingers were sore and I was desperate to just get the damn thing over with.

Finally, we got all the yarn out and I spent half of the next day combing out the rattail dreads.  At last, I was able to run my fingers through my hair again, and shampoo and condition like normal.  My scalp was thrilled to be scratched and massaged and moisturized.  My head feels about 5 lbs lighter.  Once my hair was clean and dry (in less than a half hour!), I sat down with the Tingler wire scalp massager thingy and had a few rather delicious moments of cranial ecstasy.  Aaaahhhh!

My hair has grown about 5 inches since I first had the braids installed.  This seems like a lot more growth than I normally have.  Perhaps the weight of the yarn sped up the process?
Unfortunately, it’s still fine and thin, and now more gray then ever, with that frizzy, wispy old lady texture.  I definitely look older – shockingly so, because of the huge contrast from the thick, dark dreads I had a week ago.

Not sure what I’m going to do with it. 
Right now, I have zero desire to re-install the yarn.  The removal process was rather harrowing. I was considering writing up a tutorial on the method, but after enduring the removal process, I don't know that I'd recommend it.  Perhaps I'll continue to experiment and modify the technique at some point.
But not right now.

My fuzzy old lady hair feels like a soft cloud on my shoulders.  I kind of like it.
And tonight, I’m going swimming.  And diving right in without hesitation. 

YESSSS!!!!

Wednesday, July 3, 2013

Shakti Series Video Montage


I've put together a little video montage of my Shakti Series. I recommend clicking the link below, so you can see it full size.

Soundtrack music is a beautiful song called "Endless Reverie" by Azam Ali.

Please share this video, and/or leave a positive comment on the YouTube page. 
Every little bit of support helps!

Tuesday, June 25, 2013

River Goddess: A Peek Behind-the-Scenes Part 3: Devising the Details


     My River Goddess is coming along nicely.
I've pretty much got the headdress worked out.  I considered putting some peacock feathers in there (associated with both Oshun, the Yoruban fresh water goddess and with Sarasvati, a Hindu river goddess), but after experimenting with a couple of variations, I thought it was just too busy.  You can see a reference pic and a couple of attempts at peacock feather eyes lingering off to the right of the drawing board in the screenshot above.
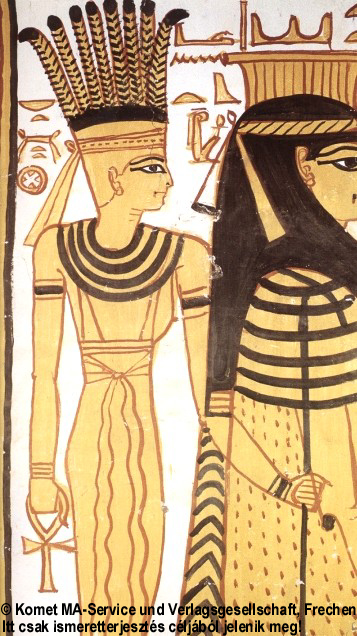
I opted to just stick with the striped feathers as seen in some depictions of Anuket (see pic at right), and added some simpler curling feathers at the sides.
The collar and baptism symbol are finished, though I am still experimenting with the design of the chest area.  It doesn't feel quite right to me yet.  Often, if something is not quite flowing perfectly, I'll leave that area and continue with some other part of the drawing.  Eventually a solution comes to me.  Sometimes the Muse needs some downtime to come up with some inspiration. Sometimes filling in the rest of the drawing will help me determine how to handle those areas.
I decided to remove the clay figurine version of Anuket from the tail area. I've concluded that it's unnecessary, as she's already well-represented in the piece.  Instead, I've decided to put a stream of water flowing down the middle of the tail to blend it in with the waterfall at the bottom (which is looking a bit like some kind of 4-legged octopus at this stage! Quadropus???).

 This screenshot has caught me in the midst of filling in the fish scales. Using Japanese depictions of koi fish (and dragon!) scales as inspiration, I build them from overlapping layers of simple circles.  Once the area has been covered, Ill trim the outside edges to conform to the curve of the tail.

 One thing I keep in mind as I'm putting all of this together is the balance of darks and lights. Working with only black and white can be challenging, but if handled with care, it can be used to create nicely crisp and balanced designs.

I noticed that the arm on left was a bit too big, so I adjusted that.  The other arm will definitely need some work.  I'll need to find some good references for that.  Hands can be quite challenging to get right!

Stay tuned for further sneak peeks!

Saturday, June 22, 2013

River Goddess: A Peek Behind-the-Scenes Part 2: Composition & Layout


Now that I’ve got my concept and collected references, I begin to set up my composition.


I build my images in the Illustrator program, which allows me to experiment and tweak every element until I get it just right.  Illustrator works with vectors, as opposed to pixels. This means that every shape I draw can be easily edited and adjusted by grabbing hold of the lines and manipulating them. This differs from working with pixels, which must be erased and re-drawn to alter.  Vectors are ideal for creating smooth-edged, complex, multi-layered images.

I do have a tablet and stylus, which is preferred by many digital artists, but most of my work is done with a mouse. This is the input device I learned how to use Illustrator’s ingenious Pen Tool with, and it’s still my preferred method, though some may find it clumsy.
A guy I worked with on my first professional graphic design job taught me the basics of Illustrator and Photoshop.  His guidance was invaluable, because much of it is not particularly intuitive.  After some initial confusion and frustration (which I imagine most folks who have used the Pen Tool experience), I got the hang of it and learned how to master this amazing tool.

It’s now time to build the foundation of my image.  A distinguishing feature of my style is the lighter lines on a dark background.  While I’m creating the drawing, I work in black and white.  Color comes later.

I start with a simple black rectangle, then begin to roughly sketch in the elements of the composition.  At this point, I’m just setting up guidelines to indicate where everything goes and how it all fits together.  I’m striving for balance and harmony.  Most of my compositions feature bilateral symmetry – mirror images on either side of a vertical centerline.  

I start with the central figure.  In this case, a river goddess that blends the attributes of Anuket, ancient Egyptian goddess of the Nile River, and Oshun, the Yoruban goddess of fresh waters, who is depicted with a fish tail, like a mermaid.
I use the gorgeous bust of Nefertiti as a model for my goddess’ face.  She wears Anuket’s distinctive headdress topped with plumes, and the iconic Egyptian collar. I place a medallion at the center of the headdress, where the alchemical symbol for the element of water will go.

In one hand she holds a lotus flower (a common motif in Hindu sacred art that represents purity).  Her other arm cradles a water jug (a motif often used in ancient Greek and Roman art). 
Her fish tail will eventually be covered in scales, inspired by the woodcut prints of koi in Japanese art.  The fishtail will flow into a waterfall of cascading swirls.

The two curving shapes that flow down on either side from her headdress will be filled in with images of various freshwater animals.  Flanking these streams of water life are stands of river plants – reeds, papyrus and cattails.  

I place a crescent moon over the water jug to fill the space there, as the moon is connected to water by its tidal influence.  I also drop in reference images of the Christian symbol for baptism (the shell with 3 water drops) and an alternate depiction of Anuket as a simple clay figure.  These will be replaced with hand-drawn versions of these emblems.
Now it is a matter of filling in this framework with finished elements. 

Thursday, June 13, 2013

River Goddess: A Peek Behind-the-Scenes Part 1: Concept and Research


"Unity in Diversity" Adinkra symbol
I invite you to join me on an artistic adventure! Follow me (if you dare!) as I journey through my creative process to create an new piece of art for my latest series of works.

Over the last few days I’ve solidified the general concept for my next series; Global Goddesses.
In this series, I'll explore the idea of Unity in Diversity.

Every person, culture, tribe, religion and social group on Earth has their own unique personality and way of life.  Yet most of the core ideals – the things we hold sacred – are universal; they are concepts that unite us as a single Human Family. 
We are endlessly creative in our interpretations and expressions of these ideas, but what we hold in our hearts is largely the same around the globe, and throughout history.

In the Global Goddess series, each design will take a look at a particular concept as expressed through the female deities of many cultures, combining the aspects and associated symbols into a single goddess figure that encompasses the global expression of that idea.

My first work in this series expressed the idea of the Sacred Mother, who embodies many things; the feminine gender, fertility and the creation of life, nurturing and comfort, purity, protection, unconditional love and the earth itself, among others. (Click here for more information on this design).

My second piece is focused on the idea of the sacred river, or fresh water source. 
While all forms of water are associated with feminine energy, it is fresh water that is most often represented as a female deity.  Oceans and seas, with their terrifying vastness and savage storms were more often seen as male, while rivers, lakes, ponds and springs were more often seen as more benign and life-giving – traditional female traits.

Once I’ve got my concept, the next step in my creative process is to start doing some research. 
The internet is an invaluable tool for this.  We now have access to the nearly all of human knowledge and information at our fingertips!
Google searches lead me down electronic pathways to information and references that I can incorporate into my work.  I also page through my collection of books on mythology and symbolism, and delve into YouTube, Hulu and Netflix for documentaries that touch on the subjects I’m studying.

I dive deep into the River to try to understand her essential nature. 

Along with mythological and cultural information, I also explore scientific data related to the topic.  Many of the associations and attributes connected with mythical figures are based on observations of the natural world. 
Earlier peoples who established these notions lived in much closer harmony with nature than most of us do today.  Their world was not one of man-made environments, but of wild landscapes, plants and animals, atmospheric phenomenon and seasonal changes, all of which directly effected their daily lives.  They had an intimate relationship with Nature, and saw themselves reflected in it.    
Exploring current scientific understanding of these things can lend insight to the mythical stories created by our ancestors (see the P.S. at the bottom of this entry for an incredible example of this!).

As I explore, I make notes and scribbles, compiling the ideas and symbols I want to include, and begin to start to sketch out my basic composition. 
Once I hammer out what elements I want to work into my design, I begin my second phase of research – reference for the visual images themselves. 

In the case of the River Goddess, I seek out portrayals of fresh water goddesses from around the world and throughout history.  
 I also search for references for associated imagery. In this case, fresh water plants and animals, pictures of how water and rivers are portrayed in different art styles, and various images linked to the core concepts that are related to fresh water; abundance and refreshment, baptism, healing and cleansing. 

I strive to include deities and art styles from many different cultures and blend them harmoniously.

This is my initial (very!) rough composition sketch with notes:

Since I realize how unintelligible my scribbles are to untrained eyes, here’s a transcription of the notes:
Title: Waters of Life
Plumed headdress – papyrus?  Feathers
Purity (white lotus)
Baptism (shell with 3 drops)
Streams of fish and water life:
Catfish
Salmon
Ducks
Turtle
Eel
Frog
Salamander
Piranha
Dragonflies
Water birds
Crawfish
Crabs
Snake
Water lilies
Lotus
Reeds
Papyrus
Crane
Egret
Shrimp
Otters?
Beavers?
Tadpoles
Kingfisher
Skimmers
Cattails
Healing
Fins
Blue and white beads
Oshun- fish tail
Anuket (Nile)
Rocks
Crocodile
Swirly waterfall
Flowing out
Water jug
White lotus
Shell
 The next step will be to refine my sketch and begin to design the finished elements and overall design.

Stay tuned for Part 2!


PS:  I'd like to share something I discovered in my research that I think is pretty amazing!  

The Ganges River is the most sacred river in India - revered by Hindus for many thousands of years as a life-giving goddess (Ganga Maiya).  Though her waters are muddy and polluted by the millions of people who have used and continue to use the water for bathing, laundry, sewage, disposal of the dead, and more...the people have always maintained that the water is not only safe, but cleansing and purifying.  The faithful believe the waters actually prevent disease.
Surely, this is nothing more than foolish (and dangerous) superstition!

Yet when the British colonized the area, the East India Company would exclusively use Ganges River water to take on their ships, because it was said to stay fresh on voyages much longer than any other water.  Outbreaks of water-born diseases have been comparatively lower in the Ganges area than in other highly-populated (and polluted) waterside areas.  It also produces fewer numbers of disease-bearing mosquitoes.

Western scientists have been studying this phenomenon since the late 1800's, their research producing astonishing results, but few answers. It was found that when the bacterium that causes Cholera was put into  water from the Ganges, it died within three hours, while the same bacteria continued to thrive in distilled water even after 48 hours. They also discovered that boiling the Ganges water negated this antibacterial effect.

More recent study has begun to unravel the mystery, and it is truly amazing.  It turns out that the Ganges does have unique properties that keep the waters clean. 

It has been found that a the waters of the Ganges have a uniquely high level of oxygenation (25 times higher than other rivers), which processes waste and putrefying matter much more rapidly than anywhere else in the world. The Ganges cleans up suspended wastes 15 to 20 times faster when compared to other rivers. No one is sure why the oxygen level is so high, but it may have something to do with ancient glacial melt-water sources, and the water's rough journey through the Himalayas.

The Ganges' water is also inhabited by bacteriophages - a kind of parasitic virus that attacks specific types of bacteria.  The massive amount of human usage of the river has actually maintained a thriving population of these fascinating organisms, which prevent the water from becoming dangerously contaminated with water-born diseases.

So the Ganges does indeed have fantastic powers!  Nature has provided the sacred waters with an innate, self-cleansing balancing system that keeps the waters "pure" despite the heavy burden of pollutants it takes on.

I love it when modern science confirms traditional folks wisdom instead of simply dismissing it as foolishness!  There IS magic in this amazing world of ours, and as we invent new ways of detecting and understanding Nature, we will continue to discover more of it's fascinating secrets.

Listen to an audio article about this here:

Read a text articles about this here:

Saturday, June 1, 2013

GMA Logo T-Shirts Now Available


Ladies T-shirts with our new winged heart lotus logo image are now available through my Zazzle store.

I chose the winged heart lotus design to represents my studio because I think it embodies the core of my artistic vision; an open heart, an open mind, and the free expression of the creative spirit.

There are 2 versions - one designed to work on dark-colored shirts, and one that'll show up well on lighter colors.  There is a wide variety of fabric colors to select from.
The image above includes my favorite color options.
More customizable options are also available.

Click here to check it out!

Thursday, May 23, 2013

New Products to Jazz Up Your Digital Devices


I've gotten many requests for various products featuring my artwork, so I've set up a Zazzle shop to offer a wide range of device covers, tote bags and more.  Click the link below to peruse our selection of covers for iPhones, Droid, Samsung, iPad, iPod, laptops, as well as tote bags.  Stay tuned for future products!


View more gifts at Zazzle.